Posted on 22 Comments

DPF hacking

As some people avoid to get bored over christmas holidays, they tend to analyze presents like those cheap hongkong digital picture frames (DPF) that you normally give to your children so that they can lose it the next day.

Of course, other people always have kind of a similar idea, so it is not surprising that there are web pages describing internals of those undocumented devices.

However, the device I got is using another chip (AX206) than the already exploited st2205 based DPFs.
Since the AX206 has a 8051 instruction set, I had a sneak peak with my d52 disassembler. And it turned out, it was possible to have my own code run on the frame, without actually knowing anything about the environment. To access the internal flash, there are various tools listed at the site linked below. The DPF emulates a mass storage device over USB, vendor specific commands are used to do the standard SPI flash operations. The AX206 seems a powerful chip, and we were actually thinking on using it on a project, however there were too many unanswered open questions and the mass price (30k units) was not competitive considering the puzzling support. If a company buries a simple 8052 controller behind NDAs, the suspicion may arise that the chip has too many bugs.

Hacking a more or less unused vendor specific SCSI command in the DPF, I was able to make lcd4linux work with it:
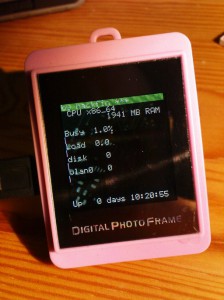
lcd4linux on DPF
lcd4linux on DPF

Find more information on this Wiki:

http://picframe.spritesserver.nl/wiki/index.php/DPF_with_AppoTech_AX206

Posted on 2 Comments

Green laser surgery

I’ve obtained a Green laser module from DealExtreme (sku.26887) that was kinda broken on arrival, so it had to disintegrate for the sake of curiousity.
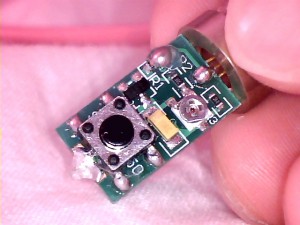
One plus of this module: It has a constant current driver. See the read back schematic here: laser driver schematic. The wires of the driver PCB were really weakly soldered, they came off after a turning the module around a few times. The quality of these modules are questionable, but what does one expect, at a price of roughly 8 USD.

Driver PCB
Driver PCB

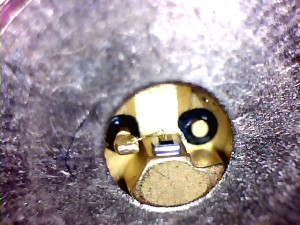
Since the optics were rather misplaced, I had a look at the frequency doubler crystal. It seemed slightly broken as well, so I knocked it off. Note that one should never run the diode at full power without protection glass, even invisible light can harm the eyes. Nevertheless, you can see a very weak red glow when you run it at low power. Also, you can use a standard webcam with a lens without IR filter to estimate the light intensity coming out of the diode.

The potentiometer is used to set the maximum diode current. Don’t overdrive, the diode can die instantly. It has no built-in photodiode for feedback stabilization, but  the regulator circuit seems quite robust to voltage swings. Do not exceed 5V through,  the transistor will heat up. Since I don’t have the specs of the diode, I don’t know how long it will last under continuous load.

Laser diode
Laser diode

There’s more experimenting to come, like modification of the driver circuitry in order to modulate the laser with a low frequency. Still awaiting the next batch of lasers..

For further reference, I recommend the well known LaserFAQ at:

http://www.repairfaq.org/sam/laserfaq.htm