The USB communication stack is a complex one. It is mostly covered by a library like WinUSB on the Microsoft side, or a libusb on posix/unix compatible systems like Linux. To summarize shortly, USB has roughly three different command types:
- Control messages
- Bulk I/O
- Isochronous packet streaming I/O
If you’re familiar with TCP/UDP networking, you might compare the Bulk transfers to TCP, the isochronous transfers to UDP, likewise. So in general, the netpp packet architecture (that bases on these transfer types) applies well to USB.
The control messages again are used to query information from the device and determine the device class, such as a Mouse/HID device, web cam, storage, etc. Now the question is, how to use netpp’s automatic device property query methods for (self-made) USB devices.
netpp tunneling
USB transfers are comprised of Endpoints. These merely represent different communication channels over the same physical interface. Some end points have fixed characteristics for the USB standard protocol, such as EP0 being used for control messages to identify the device or set specific operation modes. Other end points can be freely defined by the firmware, their function again is communicated by control messages.
On a bulk transfer end point defined by firmware, for example, we can simply transfer raw netpp packet streams (with the netpp header plus payload) to/from a backend and have a simple daemon run on the USB capable uC or even FPGA.
For a control transfer endpoint, the command structure is predefined, different packet types would be off standard (we’ll postpone that discussion). The command structure uses a 8 byte header, containing in particular a 16 bit index and 16 bit value number to communicate a specific parameter setting. This can be used as and identified like a netpp TOKEN.
So, using some light translation between netpp property TOKENs and USB control headers, we can implement a simple tunneling protocol that is USB backward compatible. This is achieved using VENDOR request types. The request command set is, by default, netpp specific and uses the same primitive command set of up to eight remote procedure calls.
netpp proxies
netpp proxies are considered the ‘modern’ way of netpp’s protocol translations, as it exposes the interface to the network mesh of interacting devices. A quick demonstration: When netpp is browsing the network (by broadcasting “Is there a netpp service?”), we will get a list of devices, one of them being a proxy (‘PRX’):
Child: (H) [80000007] 'PRX:192.168.56.1:2014'
  Child: (P) [80080001] 'USB:0:04b4:00f3:00:00'
  Child: (P) [80080002] 'USB:0:04b4:00f3:82:00'
  Child: (P) [80080003] 'USB:0:04b4:00f3:04:00'
The proxy again detects known attached USB devices and lists them.
Accessing them is done by the proxy identifier:
netpp PRX:192.168.56.1:2014+USB:0:04b4:00f3:82:00
and we will get a device property list like:
Properties of Device 'FX3Sampler' associated with Hub 'PRX':

Child: (S) [0000000c] 'Acquisition'
Child: (S) [0000000f] 'SystemControl'
...
End point tricks
The USB end point architecture give us a lot of freedom by implementing any specific vendor command on the back-end. By default, our devices would always support a netpp channel on EP0 through the command message wrapper.
On the other hand, we can simply tunnel netpp through EP4 (send) or EP82 (receive) channel, if we wanted to support the netpp protocol. However, this might not be desirable for a specific device type that implements a specific USB class. In this case, we’ll only support netpp tunneling through the vendor command set to change operation parameters.
Driver aspects
Maintaining different USB devices with specific drivers can – depending on the operating system – consume quite some time and resources for verification and driver compliance testing. Under some circumstances, if the functionality is custom specific anyhow, it may reduce the maintenance overhead to use a device agnostic driver or handle everything through user space USB libraries (such as libusb).
So, once a USB device supports the netpp RPC command protocol on EP0, it is possible to query all non-standard extensions as named properties from the device and all handling of these properties is done from user space (unlike kernel space which would require a specific driver).
The ideal world of netpp device classes then would look as follows:
- Choose a VID/PID (go through the famous usb.org registration procedure)
- Configure netpp USB class descriptor (“This device speaks netpp”)
- Start coding (write property handlers, export register entities via XML, …)
The real world, however, looks like that (2) is neither specified nor standardized. Of course you’d need to be usb.org member and a big company to take any influence.
Therefore the current ‘reference solution’ just probes for netpp support based on a list of known devices (judged by their VID/PID).
Reference solutions
Speaking of which: How does one actually implement this?
This is merely the standard approach for all netpp capable devices. Defining the Properties in the XML device description is the same thing as for all other transport layers.
On the USB side, hooks for vendor specific control commands need to be implemented to call the usb_cmd <—> netpp translation layer. A main loop will need to poll the necessary receive and send handlers.
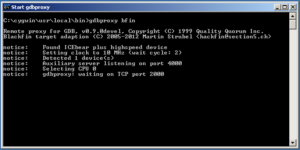
On the master side, i.e. the relay or proxy, the usbproxy server will have to be run for this backward compatible protocol. A proxy can be configured as a simple local translation layer, such that it appears as a local hub without external network access. It then only takes the function of an extended protocol hub, currently identified as “UCH”: “USB control hub”. The UCH layer would be a candidate for possible generic kernel driver integration. However, so far I have found no urge to move this support into kernel space. This simple concept runs transparently (using the same client) on several backend microcontrollers, such as:
- Cypress FX3 series
- ST STM32F USB capable controllers
- Cypress FX2 and custom 8051 based USB controller using program overlay (slow)
Proxy specials
Normally, a USB device always appears as a slave device, i.e. it does not create requests on its own. However, this might very well be different, as the case of a HID device, sending unsolicited INTERRUPT messages. In netpp-speak, it is in fact a master. In some scenarios, a response from the host device might be expected, however, the USB protocol does not have such a reversible protocol character, so it needs to be implemented using specific command queues. This, however allows a USB device to actually query networked netpp capable nodes through the proxy. A powerful feature, but also dangerous, as an infected 8051 stick could in theory scan your IoT network for services. This calls for extended security.
Authentication
netpp does not implement an authentication method in its native layer. It either relies on an encrypted transport layer or a simpler ‘nonce’ scheme for safety (not security!), or it expects to be tunneled through a SSL (secure socket layer) proxy for a automation solution, for example.
However, it is possible to implement an authentication scheme on the property layer by the developer. A simple challenge-response-system is easily implemented as a short property get/set sequence. A more secure proxy is then only allowing a forward request from a USB device to the network, if it is authenticated and enabled. However, the driver layer needs to ensure that a malign USB device is not taking over the identity of the correct device on the USB bus. Unfortunately, this can only be avoided by introducing the above security nonce scheme, full ‘capture protection’ will require a completely encrypted transport layer.
Wrap up
This is only one of many possible ways to simplify USB communication and parameter/functionality maintenance of a device class. There are many different approaches, one prominent one being the GenIcam standard that is however restricted to machine vision systems (cameras). The interesting thing here is the developer’s protagonism (“reduce boring work load”) and the big vendors antagonism of ruling a standard (“make money by being incompatible/define a proprietary ‘standard'”). On the other hand, different interfaces will always legitimate themselves for specific purposes. Our primary objective is basically to be able to handle these different standards in software with minimum coding maintenance overhead.
updated 26.5.2019