Posted on Leave a comment

Unlocking USB sticks from Ubuntu/Linux

Just recently, I bought a USB stick from a major discounter. When sticking it in, it showed some preinstalled software to configure a hidden partition. Ok, nice feature, when you lose your stick.

Let’s have a look at the outlines:

Bus 002 Device 035: ID 13fe:3623 Kingston Technology Company Inc.

It is branded as a Maxell pen drive.

I will not go into the security details, but take my advice and don’t assume your data is well encrypted or really secure. An electronics Pro will be able to read out your data!

Anyhow, so I have my hidden partition, but I’d like to see it from Linux, too (why would I use anything else, ha ha). Bummer, no Linux support. Not giving up early though. We know that a USB drive is in fact a SCSI disk, so it is all about sending the right vendor extension SCSI commands to the right target.

In Linux, this is simply done accessing a scsi generic device. Before losing any more words, here is the C source for it:

Kingston USB memory unlocker source code

You have to compile this utility yourself (do not ask for binaries, or you’ll be pushed with a soft cushion) and run it using sudo or as root (both potentially dangerous) and enter the correct password (when prompted with “Phrase:”) that you have entered when configuring the device under Windows. I’m afraid, no support for setting up the partitions and protection under Linux.

If the password is correct, the drive will reconnect automatically and show up in your file manager.

The Windows Lock tool will give you only a number of limited attempts trying to guess the password before the hidden partition is erased. It has not been tested whether this is a hardware feature or done by the software tool. Comments welcome.

Big fat WARNING: This is an experimental tool. Make sure you do *not* access your hard disk!

To determine the generic SCSI device, see the ‘dmesg’ output after sticking in the USB pen drive. My code above will do a check for the drive ID string, but this might not be paranoid enough.

 

Posted on 2 Comments

DPF hacking part three

Sorry, sorry, sorry.

Time flies! We had the full standalone firmware running for a while, but just didn’t get around to publish it.
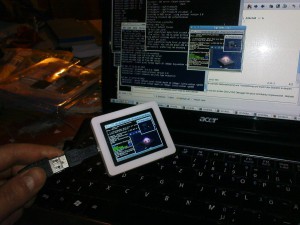
It’s nice to see that plenty of people are actually using this hack on their linux powered sat receivers, dreamboxes, etc.
Less nice to see, that people do mods, but don’t contribute back. Didn’t exactly motivate us to release the most recent fun stuff. But anyhow, we give it another go by kicking out another 0.200 developer release. This contains the raw framework only. No games, and no fun stuff. Although one most wanted feature comes with it: no more waiting for the device to go in bluescreen mode to be ready for lcd4linux.

Here’s a package with the ready built firmware:

[ removed ]

If you have successfully managed to get the hack to run on one of your DPFs, then you’ll likely be able to determine your DPF type (blue, white, etc.).  If you don’t, you’ll have to do some trial & error. Just flash the entire .bin image to your DPF using ProgSPI.exe or restore.py. For detailed instructions, there are various readme files in the source distribution.

To obtain these utilities or checkout the current source, see links in DPF hacking part two

VNC on DPF
VNC DPF client demo

There’s some fun stuff in the next box, really. The 1.0 firmware will have support for a full remote display based on the VNC protocol. For efficiency, the 1.0 protocol will not be compatible with the current SCSI command emulation. So for all programmers: Don’t access the DPF directly, if you want to use future versions. Use the dpflib only!


One last note: We’ve come across a few pre-flashed Pearl units sold on ebay for a 3x price. Guys, that simply is lame. If we wanted to make money, we’d have done that way earlier.

Posted on 38 Comments

DPF hacking part two

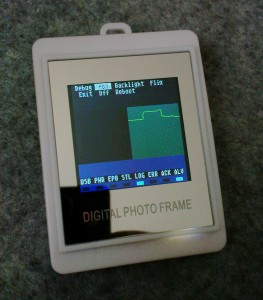
It turned out by some further hacking that we could run a bit more than just patched code bits on these little frames. This is the next step of development, where things are actually getting fun: Running our own firmware on the AX206 chip using the SDCC’s built in bank switching technique.

128x128 DPF firmware
128×128 DPF firmware

As seen in the image, we have a little slow scope running, using the built in ADC. It turns out, that this chip is quite good at power saving, once you activate all possible options to turn off various clocks. It can obviously run for weeks with just the real time clock running, waking up the chip every second, then for example doing something every 30 seconds, then putting it back to sleep.

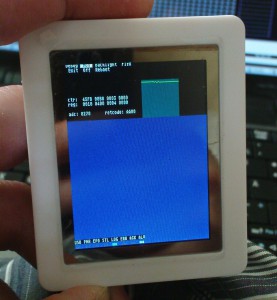
Also, a few extra modes for lcd4linux were explored, like setting backlight intensity and orientation. On the 320×240 frames that are for example available here http://www.pearl.de/a-HPM1184-5618.shtml, we use the display in portrait mode as seen below.

240x320 USB display hack
240×320 USB display hack

This is not very pleasant to the average user, therefore this solution will need to mature a little before it is actually safe to release.

The full blown framework to build code for the DPFs using SDCC is published here:

https://sourceforge.net/projects/dpf-ax/

SVN access to the sources:

svn co https://dpf-ax.svn.sourceforge.net/svnroot/dpf-ax/trunk dpf-ax

UPDATE: The bootloading protocol is now decoded. Code can be loaded on bricked frames, find a flash update tool in the above repository. A brief intro how it works:

When the DPF goes into Bootloader mode (showing USB ID 1908:3318), it expects max. 64 byte size USB interrupt messages with a header and payload data. The header implements a simple Remote Procedure Call format through the bootload handler. Its format is as follows:

typedef struct {
	unsigned char len;
	unsigned char chk;
	unsigned char jmp[2];
	union {
		// Structures for various backends
		// The default memory loader:
		struct {
			unsigned char offset[2];
			unsigned char buf[BUFSIZE];
		} loader;
		struct {
			unsigned char opcode;
			unsigned char n;
			unsigned char buf[16];
		} spi;
	} u;
} UsbMsg;

Description

The ‘len’ byte specifies the full length of the USB packet. ‘chk’ is a checksum that is consecutively updated with every packet sent. The ‘jmp’ field contains the jump address of the handler that takes care of the attached data payload. For simple memory writing, the address of the internal ROM memory write routine is used. Once a program (for example flashing routines) is loaded into memory, it can be jumped into using this RPC scheme.